
Our Knit and Stitch group got together over cake and wine this week to work on the finishing touches of our joint contribution to the Crib and Wreath Festival at our local church. We have been allocated the font which is great as it gives us a focal point, but it has to be quite a statement as the font is directly in front of the main door. The final decision was to create a set of Christmas Garlands which could be draped around the font, and then split up into 6 pieces to sell separately as a fundraiser for the Church.
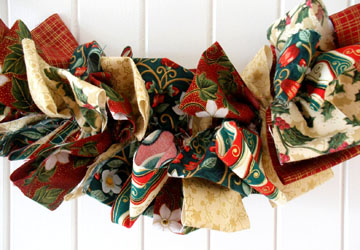
It was a bit of a challenge to come up with a design for something eye-catching but simply made, which could be shared amongst the members, worked on at home and assembled at the meeting, but I was pleased by the final design. Although the final wreath will encircle the font, it will dismantle into four individual parts which can then be hung over a fireplace or door as a swag. I think the rich deep colours will look lovely against the old stone in the church, but I want to adapt the design using red and white, stripes and gingham to give it a more Scandinavian feel. Just thinking about it makes me feel Christmassy!

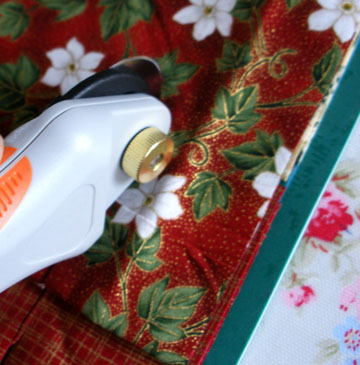
It’s a really simple construction which I will endeavour to pass on. I used an assortment of fat quarters of christmas fabrics which I partly unfolded and then cut into strips using a cutting wheel. My strips were about 2″ wide.
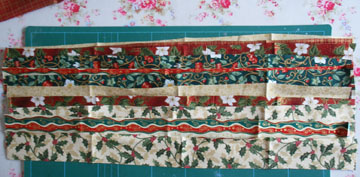
I then opened all the strips out…
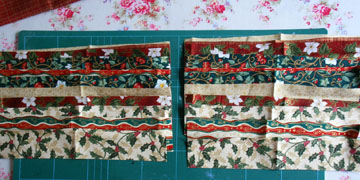
and cut them in half…
Take each piece and fold it sides to middle, overlapping the edges in the middle by about a centimetre. Make two rows of stitching each side of the centre, making a channel for threading.
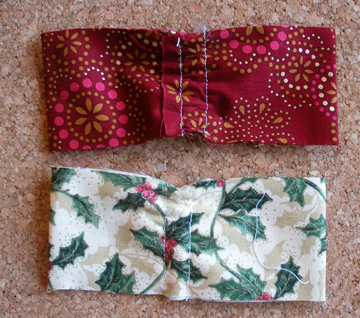
The quickest way to do this is to feed the folded pieces through the sewing machine one after another in a continuous line, without cutting off between each piece. When you get to the end, feed them all through again to do the second row, then cut them apart. There is not going to be any strain on the stitching so you don’t need to tie off the threads.
Then thread the pieces on to a thick piece of yarn or piping cord.
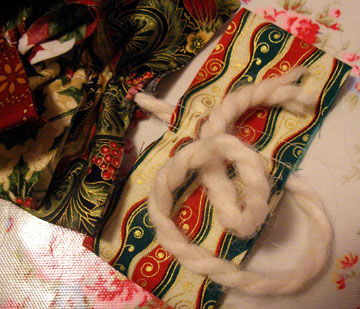
You need it to be thick and fluffy so it grips the fabric and allows you to gather up each little ‘bow’ section and fluff it out
To finish it off, make ‘berries’ by cutting out circles about 2″ across from a plain fabric, running a gathering stitch round the outside, stuff with toy wadding or cotton wool, pull the thread tight and stitch to close.
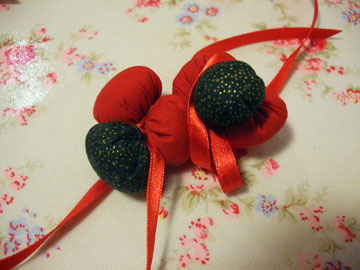
I stitched the berries in groups of three on to a ribbon which I then tied at intervals on the garland.

This is not the best tutorial as I rather worked backwards and it assumes a degree of sewing knowledge, but if you are sewing novice who needs to know more, please tell me and I will be more explicit. I will definitely be making more, so I can improve on the instructions.
I am really looking forward to photographing the finished wreath in situ, all around the font, with the christmas crib knitted by one of the Knit and Stitch members in pride of place on the top.
 Follow
That’s very pretty and I love the sound of a stripey ginghamy one ! You’ve explained it all beautifully and even I might be able to manage this . Heaven knows I’ve got enough material !
That’s such a lovely idea – simple but it looks really effective, and much better than plastic holly stuck into polystyrene!
Gosh that’s clever! Love the sound of a Scandinavian inspired one too.
All very clear, I can sort of guess the size of the strips but. for us non quilters, what are ‘fat quarters’?
Celia
Ah yes, you see I *need *someone to point these things out when I’m making assumptions! It’s a clever ruse by which you end up with a more useable piece of fabric. If you buy a normal quarter of a metre (or yard) you end up with a long narrow strip off the roll. A ‘fat quarter’ means taking a measured metre, cutting it in half and then cutting those pieces in half across the width so you end up with four rectangles, which are usually about 50cm x 55cm in size. This is how most cut fabric is sold in specialist patchwork shops (they must spend hours ironing, poor things!) Thanks for bringing it up, Celia, hope that helps.
Oooooohhhh – I never knew that! thanks for explaining it so clearly Penny.
Celia
Hi Penny,
I have just discovered this absolutely brilliant and amazing garland of yours! I suppose you could do the same for a springtime garland with yellows, whites, greens and blues?
Or a summer one …… ! or an autumn one …… ! :0)
Thanks for sharing this, I think I will join you with a red and white this Christmas.
Val xx
I like the sound of the spring time one. A new take on an Easter decoration I suppose, for when you get fed up with bunnies and chicks! Thanks for the comment! P x
Dear Penny, I’m so happy I looked your tutorials! This is so great idea and looks fantastic!
xxx Teje
Pingback: Norfolk Nature Walk - planetpenny.co.uk | planetpenny.co.uk
Pingback: Advent Calendar - Day Five - planetpenny.co.uk | planetpenny.co.uk