

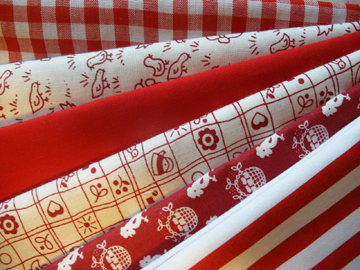
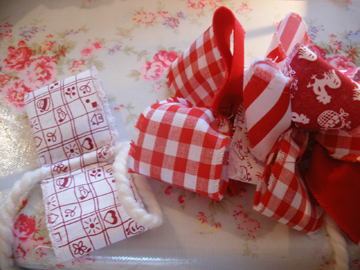
Because of the interest shown in the Christmas Swags I designed for the church font in this post I’m now springing into action with a tutorial. Although the one we made for the church was in traditonal reds and greens I thought I would ring the changes for home with a Scandinavian inspired red and white one. I bought my fabric from a patchwork shop which sells fabric in ‘fat quarters’.
(Patchwork fabric is usually sold off a 110cm (44″) width roll – a fat quarter is half a metre cut off the roll, then cut in half again, so it is approximately 50cm x 55cm (20″ x 22″) in size (a ‘fat’ quarter metre). A long quarter is simply a quarter metre cut off the bolt, so the finished size would be 110cm x 25cm (44″ x 10″).)
1.To make a swag about 30″ long you will need approximately six fat quarters in your choice of colours and prints
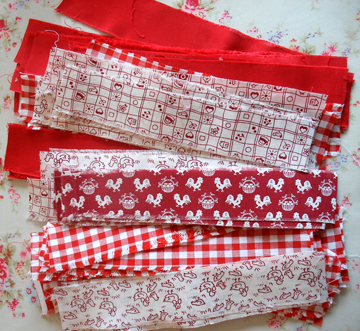
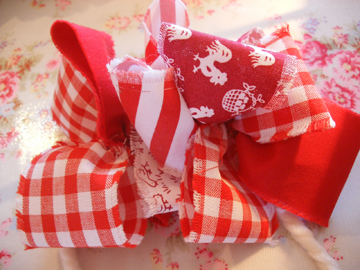
2. Cut or tear the fabric into strips 1 1/2″ to 2″ wide. I cut the strips for the swags we made for the church but as I wanted a more ‘homespun’ look for I tore the strips for a frayed edge.
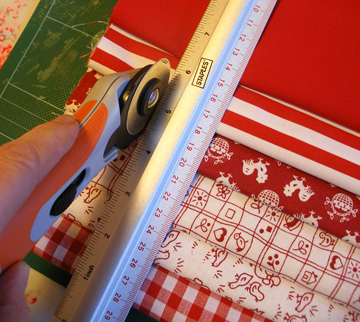
3. Cut each long strip in half across the length.
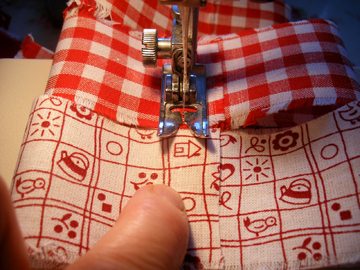
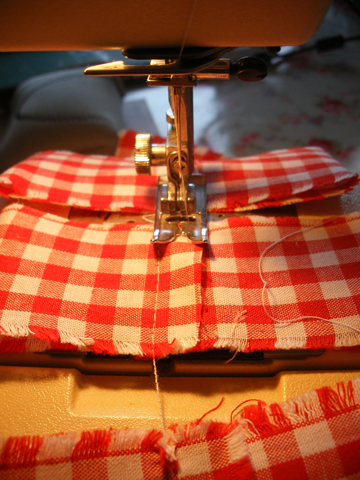
4.Fold the ends into the middle, overlapping by about half an inch.

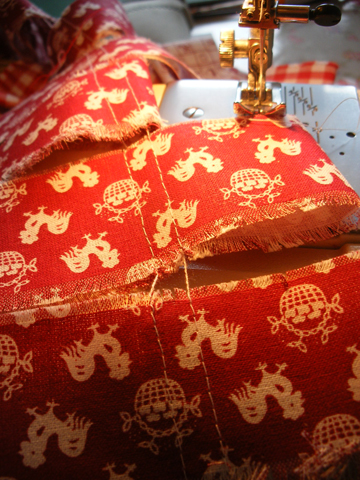
5. Machine the folded pieces to one side of the overlap as shown, feeding new pieces of fabric under the foot as you go in one continuous line.
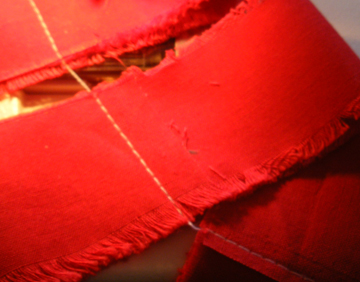
6.When all the pieces have been stitched run another line of stitching down the other side of the overlap, creating a channel in the middle.
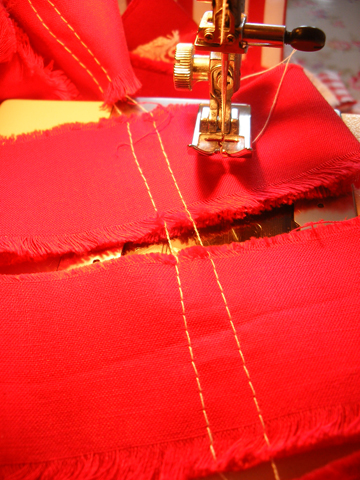
7. When all the pieces have been stitched, snip the threads to separate them. The threads don’t have to be tied off as there is no pull on the stitches.
8. Thread a needle or bodkin with a piece of wool as long as the finished swag plus extra for hanging loops.
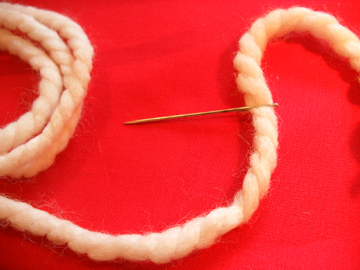
8. Thread the pieces on to the wool. I used wool because the fabric clings to the fluffy surface which helps keep the gathers in place. Then its just a case of arranging the gathered loops in place along the length and tying off the ends of the wool to makr the hanging loops.
I don’t have a picture yet of the finished red and white swag as I am still trying to source the finishing touch I have in mind but you can find out about the finishing touches for the church swags here.
I’m a bit of a novice when it comes to writing tutorials so please don’t hesitate to get in touch if anything is not clear. Have fun!
P.S. I am very happy to share this pattern with anyone for their own personal use but not for commercial reward, thanks.
 Follow
Pingback: Away in a Manger… « Pennygj's Blog