Today for the Advent Calendar I am responding to a special request for a bow tying tutorial from a regular reader which came about after the Day Twelve project, the tiny Christmas rings. These little bows are the ones I glue or sew on to projects, rather than for tying parcels or shoe laces.
As I started the photographs I realised that my lefthandedness might be a problem so I have flipped all the photos so it suits both left and right handed people. I’m just a slightly concerned about the reader who requested tutorial in the first place. Marigold is a goat… Does it work with hooves? I don’t think so, but hopefully she has a helpful human around to assist her!
I find it easier and more economical with the ribbon not to cut off a length but to leave it on the reel.
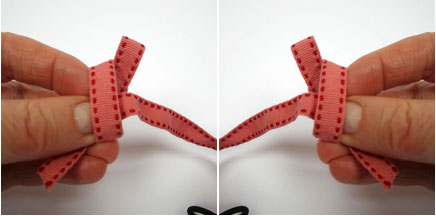
1. Make a loop at the end of the ribbon…
2. Bring the long end up in front and over to the back…
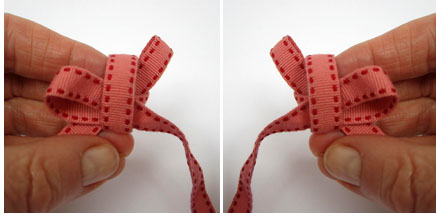
3. around the first loop then push a loop of the ribbon through the second loop formed by the thumb.
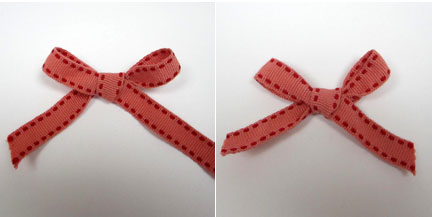
4. Pull through, and the bow is formed.
5. Carefully pull the loops to tighten the central knot to hold the loops then tweak and pull to make the loops your desired length, cut off from the reel and trim the tails.
I’ve seen ribbon bows for sale in packs of 10 or 12 in craft shops and they’re quite expensive. It bothered me for ages that whenever I tried to make my own I could never get two loops at the top and two tails at the bottom, they were always lopsided but now I’ve figured it out I buy my ribbon out of the remainder basket or in bulk and save some cash.
Now I hope you can too!
Good luck, Marigold, do let us know how you get on!


 Follow
Very thoughtful to make if for left handed and right handed people.
I’m running a little late but those spice biscuits look very like the ones my grandma used to make. Lovely!
I made those little musical ornaments with my class of 10 and 11 year olds yesterday and they worked a treat – even my adhd child managed one to take home I might add that I didn’t cut up any books either – I just printed out (double sided) two random pages off the internet (Faure Pavane by sheer accident!) on slightly heavier paper with a cream cast and we hung little bells from the bottom.
Thank you so much as I am always on the lookout for stuff I can do with my various craft classes.
viv in nz
Thanks Penny, you are a little gem for sharing this. My bows always end up wonky too and now thanks to you they will be that much neater. Loved your biscuits too xox P
This is perfect penny! Just what I needed…. my bows are a disaster. Always lopsided and I wondered how other crafters got them to look so perfect. Thank you!
So that’s the secret! (I always thought it was tying the two loops together.)
I like to leave the ribbon attached to the reel too.
Great tutorial, I sometimes find bows take 2/3 attempts but get there eventually its about even pulling on the loops.
Hey, ho! First of all let me thank you profusely for doing this tutorial. It is quite fabulous! I am having trouble with the getting it through the loop part, however. The hoof can hold it down quite nicely but it is extremently difficult to push that end through with your nose. Goatmother!!!!! Come help me!
Pingback: Christmas Countdown - Day Nineteen - planetpenny.co.uk